You want floors that look great, clean easily, and don’t wreck your budget. Sensible. Laminate is durable, design flexible, and fast to install but the gap between “nice” and “we’ll redo this next year” is all about planning and execution. In this guide, we explain what actually drives the price when you laminaat laten leggen, how to compare quotes fairly, and which details keep your floor silent, straight, and good looking for years. At Nourklusbedrijf, our promise is simple: predictable outcomes, clean seams, tight transitions, and a schedule that respects your home. A single “price per square metre” rarely tells the whole story. Subfloor condition is the first lever: uneven concrete, soft chipboard, or adhesive residue adds prep time before you have laminate laid. Room geometry is the next one: open rectangles go quickly, while angled hallways, bay windows, stair noses, and many doorways demand extra cuts and careful finishing. Underlay choices matter too. Apartments often need acoustic layers; ground floors may require vapour barriers; radiant heating needs underlay with a certified thermal resistance. Finally, material grade moves both cost and lifespan. Higher AC ratings, water resistant cores, and bevelled edges raise the bill but also reduce wear and swelling over time. Finishing details skirting, colour matched profiles, silicone at wet perimeters take time to do right and are the difference between “installed” and “finished.”
DIY versus professional installation
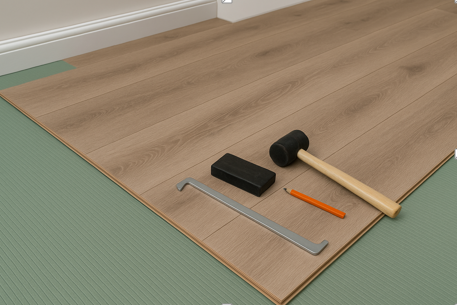
Click systems make laminate look deceptively simple. The clicks are easy; the preparation and finishing are not. Before you have laminate laid, a pro will test moisture, check flatness, and plan plank direction so seams run with the light and long sightlines. Door jambs get undercut rather than notched around, expansion gaps are consistent, and transitions sit flush. Site logistics also matter: dust control, clean cutting zones, and protecting adjacent rooms keep the rest of your home functioning during the work. If your space is a tidy rectangle and you love hands on projects, DIY can be satisfying. If time is tight, the subfloor is questionable, or the plan includes many thresholds, professional help avoids the expensive kind of “learning.”
Choosing direction, pattern, and continuity
Direction is a design decision, not a habit. In most living spaces, running planks parallel to the main light source or along the longest wall elongates the room. Hallways usually feel best lengthwise. If you have laminate laid through multiple rooms, set a datum line first so transitions align and you don’t end up with slivers at doorways. Herringbone or chevron looks premium, but it increases waste and labour; budget accordingly and confirm that your subfloor flatness meets the tighter tolerance these patterns demand.
Sound, comfort, and underfloor heating
Underlay is not “just foam.” Acoustic layers can dramatically reduce footfall noise vital in apartments and thermal options take the chill off slab floors. For radiant systems, both laminate and underlay must list approved thermal resistance; the wrong combination traps heat and harms efficiency. When you have laminate laid over heating, always request the data sheets and confirm compliance before ordering.
Scheduling, furniture, and dust control
A smooth project is mostly logistics. Clear rooms fully where possible; if not, we stage furniture moves. We cut outdoors or in a contained area, use extraction, and seal adjacent rooms as needed. Good tape lines, floor protection, and end of day clean ups keep your routine intact. If you have laminate laid across several rooms, we’ll phase it so high use spaces remain available whenever possible.
See also: Different Types Of Potatoes Every Home Cook Should Know
The only list you need: The mistakes to avoid
Before you have laminate laid, this short checklist will save you money, noise, and stress:
- Skipping acclimation: Give boxes 48-72 hours in the room to equalize; otherwise expect seasonal gaps or tenting.
- Using the wrong underlay: Apartments may require acoustic ratings; ground floors often need vapour barriers; radiant systems need certified thermal resistance.
- Ignoring expansion: Crowded edges buckle; oversized gaps look sloppy. Follow the manufacturer’s perimeter spec with real spacers.
- Bridging humps and dips: Planks will flex and creak if the subfloor isn’t flat. Spot level or skim coat to the stated tolerance.
- Rushing doorways and thresholds: Most callbacks start here. Undercut jambs, align transitions, and colour match profiles.
- Starting without a datum line: In multi room runs, plan from the middle out so cuts stay generous and aligned.
Why choose Nourklusbedrijf
We start with questions, not assumptions: how you live, where sound matters, where spills happen, and what your timeline really looks like. Then we test moisture and flatness, confirm the right underlay, and map direction, transitions, and profiles before a single box is opened. During the work you get clear updates; after, a walkthrough and care tips. When you have laminate laid with us, you’re buying more than installation you’re buying predictability.
Ready for a clear, line by line quote?
Send room sizes, a few photos, and anything you know about the subfloor. We’ll reply with options at different price points and explain where spending more makes sense and where it doesn’t. Whether you plan a single room now or the whole floor in phases, you can have laminate laid on time, on budget, and built to last.
Discover how Nourklusbedrijf can support you with tailor made solutions.